Working with multiple environments in Terraform
Published on Sep 02
The past few year, Terraform has emerged as the go-to tool in the ever-evolving world of infrastructure management. It allows teams to define, provision and manage their infrastructure with great efficiency. As projects grow and evolve, the need to separate environments for development, testing and production grows with it. After all, it’s important to be able to test and develop new features before pushing them to production, just like developers do with applications.
In this post, I’d like to discuss my personal insights on working with multiple environments in Terraform. I’ll go over 2 native options and one third-party tool, called Terragrunt. Whether you’re a seasoned infrastructure guru or a curious newcomer, we’ll (hopefully) be able to learn something new as we embark on this journey.
Different directories
This is our first option, using different directories to manage various enfironments in Terraform. This allows us to organize our project into separate directories, each representing a specific enfironment. Each environment makes use of a set of shared modules which minimize code repetition.
In these directories, we’ll define our variables, configure the modules and configure a state backend. By doing this, each directory has its own configuration (based on predefined and shared modules) and its own state. An example of how a project using different directories to separate environments is organized, can be found below.
└── README.md
└── modules
    └── network
    └── kubernetes
    └── ...
└── prod
    └── main.tf
    └── terraform.tfvars
    └── variables.tf
└── test
    └── main.tf
    └── terraform.tfvars
    └── variables.tf
Configuring an environment
Once we’ve create our directory structure, we can go ahead and configure the resources for an environment. As an example, we’ll set up the test environment using the resources inside our shared modules.
module "network" {
  source          = "../modules/network"
  cidr_block      = "10.40.0.0/16"
  subnets_private = ["10.40.0.0/19", "10.40.64.0/19", "10.40.128.0/19"]
  subnets_public  = ["10.40.32.0/20", "10.40.96.0/20", "10.40.160.0/20"]
}
In the example above, I kept things simple by not using variables. But it is completely possible to use variables. All you need to do is create a a variables.tf and terraform.tfvars file in the environment’s directory. These files are environment-specific, which allows you to set separate variables for each environment.
Once everything has been configured, you can initialize, plan and apply the resources. This can be done from the root of the project by adding the -chdir= argument followed by the environment’s folder to the Terraform command.
terraform -chdir=./prod/ init
terraform -chdir=./prod/ plan -out=plan.out
terraform -chdir=./prod/ apply
Creating a new environment is as easy as creating a new directory (for example test) and configuring it like you did for prod (but of course with the right environment-specific values).
Thoughts
This is my personal favorite, as it keeps a clear overview over the environments and their configuration while not introducing new tools. It allows for new team members to get up to speed fairly quickly (with the right documentation) and does what it needs to do.
| Advantages | Disadvantages |
|---|---|
| Clear separation between environments | Potential code duplication as you the same module for different environments |
| Capable of having specific features in specific environments | Maintaining consistent module versions through environments can be difficult |
| Consistent and reusable code by using shared modules with environment-specific configuration | Separate state files for each environment require additional configuration |
Simple deployment workflow by passing the -chdir argument |
Terraform workspaces
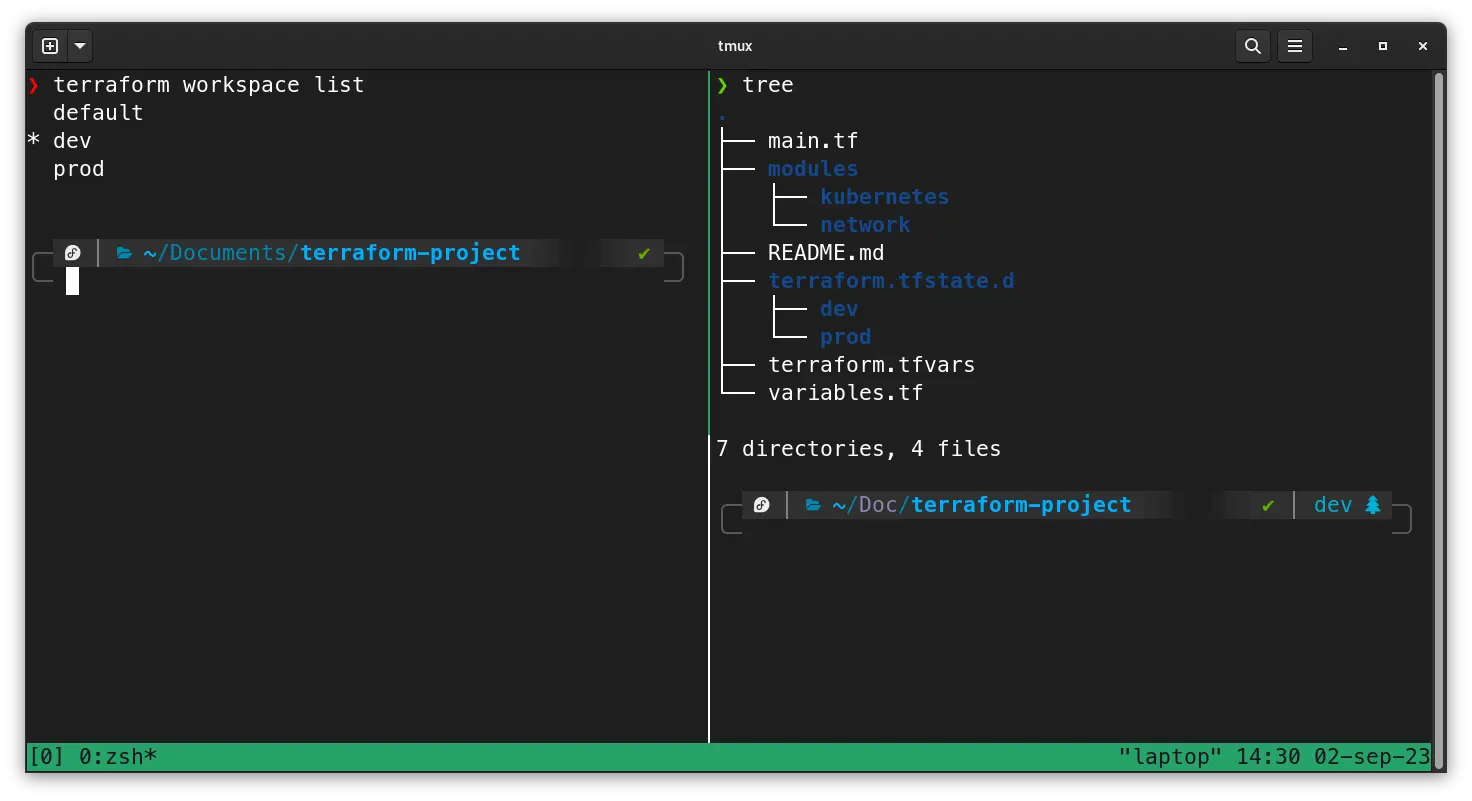
The second option I’d like to discuss is using Terraform workspaces. They provide a powerful way to separate environments within the same Terraform code. Each workspace acts a separate context, allowing you to set specific variables, resources,.. without needing separate directories or code duplication.
Terraform workspaces are especially useful when your environments have minor differences. They allow you to maintain a single codebase while having environment-specific configurations. This allows you to define your modules only once and configure them based on the value of the terraform.workspace variable, but more on that later.
An example of how a project using Terraform workspaces to separate environments is organized, can be found below.
└── README.md
└── main.tf
└── variables.tf
└── terraform.tfvars
└── modules
    └── network
    └── kubernetes
    └── ...
Managing workspaces
The CLI provides a set of subcommands that allow you to create, list, select, and delete workspaces.
| Command | Description |
|---|---|
terraform workspace new <name> | Creates a new workspace |
terraform workspace list | Displays the names of all created workspaces |
terraform workspace select <name> | Selects a specific workspaces |
terraform workspaces show | Shows the name of the current workspace |
terraform workspace delete <name> | Deletes a specific workspace |
Each workspace maintains its own separate state, ensuring that resource changes in one workspace, don’t influence resources in other workspaces. By switching between workspaces, you can deploy changes to the desired environment.
Configuring an environment
Contrary to working with different directories, Terraform workspaces only require your code to be written once (there’s no - or very minimal - duplication). This means we can create our main.tf and define the resources for both test and prod (assuming they use the same).
When working with Terraform workspaces, we can use the terraform.workspace variable to retrieve the name of the currently selected workspace. You can use this variable to conditionally set values in your Terraform configuration based on the active workspace. For example, when you want to create 3 EC2 instances when you’re working on production and only 1 when you’re working on a different workspace you can do something like this:
resource "aws_instance" "example" {
	count = terraform.workspace == "prod" ? 3 : 1
	# Other instance configuration goes here...
}
The terraform.workspace variable is not only useful for conditional configurations, but it also comes in hand when you want to select values from a map in Terraform. This becomes particularly useful when you want specific values for resource or module arguments based on the active workspace. In the example below, I have my “network” module which gets configured using values which get extracted from maps based on the terraform.workspace variable.
locals {
	vpc_cidr_block = {
		prod = "10.40.0.0/16"
		test = "10.30.0.0/16"
	}
	vpc_subnets_private = {
		prod = ["10.40.0.0/19", "10.40.64.0/19", "10.40.128.0/19"]
		test = ["10.30.0.0/19", "10.30.64.0/19", "10.30.128.0/19"]
	}
	vpc_subnets_public = {
		prod = ["10.40.32.0/20", "10.40.96.0/20", "10.40.160.0/20"]
		test = ["10.30.32.0/20", "10.30.96.0/20", "10.30.160.0/20"]
	}
}

module "network" {
	source          = "modules/network"
	cidr_block      = var.vpc_cidr_block[terraform.workspace]
	subnets_private = var.vpc_subnets_private[terraform.workspace]
	subnets_public  = var.vpc_subnets_public[terraform.workspace]
}
Thoughts
This option comes as a close second favorite in this list. I like how easy it is to switch workspaces and how clean you can keep your code using the terraform.workspace variable. The only real issues I have is the fact that you can’t have different backends and module version for workspaces. When developing new features, I’d like to test my modules on a test environment without influencing the production environment. Once there is a solution for that, this might just be my personal favorite.
| Advantages | Disadvantages |
|---|---|
| Integrated in Terraform, no 3rd party tooling necessary | Only one backend for Terraform states (but one state per workspace) |
| Single Terraform configuration for multiple environments | You cannot have a different version of a module for different workspaces |
Very simple environment switching by using the terraform workspace command | Can be difficult to depend on resources between workspaces |
| Automatic state management, each workspace automatically has its own state |
Terragrunt
The third and final option I’d like to discuss is a 3rd party tool called Terragrunt. Operating as a wrapper around Terraform, Terragrunt introduces functionalities such as code reuse, dependency management, and hierarchical configuration. This tool is specifically crafted to enhance the management of diverse Terraform environments.
Terragrunt allows you to create reusable modules and configurations, providing a way to share configurations across different projects and environments. Its configuration structure simplifies the process of defining settings at various levels, ranging from the project’s root down to the environment and module levels. This architectural approach streamlines the management of configurations while effectively mitigating the duplication of code.
Let’s take a look at how we need to set up our project structure in order to use Terragrunt. In the example below, I’ve used the same set-up as the past two options (two environments, test and prod, and two modules, network and kubernetes).
└── README.md
└── terragrunt.hcl
└── modules
    └── network
    └── kubernetes
    └── ...
└── prod
	└── env.hcl
	└── network
		└── terragrunt.hcl
	└── kubernetes
		└── terragrunt.hcl
└── test
    └── env.hcl
    └── network
		└── terragrunt.hcl
	└── kubernetes
		└── terragrunt.hcl
Configuring an environment
The big difference with “vanilla” Terraform is that Terragrunt requires various .hcl files, in which you tell Terragrunt what to do. In the root of the project, we’ll have a terragrunt.hcl where all the basic configuration (providers, remote states,..) are configured.
# Generate an AWS provider block
generate "provider" {
  path      = "provider.tf"
  if_exists = "overwrite_terragrunt"
  contents  = <<EOF
provider "aws" {
  region = "${local.region}"

  # Only these AWS Account IDs may be operated on by this template
}
EOF
}

# Configure Terragrunt to automatically store tfstate files in an S3 bucket
remote_state {
  backend = "s3"
  config = {
    encrypt        = true
    bucket         = "${get_env("TG_BUCKET_PREFIX", "")}terraform-state-${local.account_name}-${local.region}"
    key            = "${path_relative_to_include()}/terraform.tfstate"
    region         = local.region
  }
  generate = {
    path      = "backend.tf"
    if_exists = "overwrite_terragrunt"
  }
}
Once we have that, you can create an env.hcl file for each environment containing the environment-specific variables.
# Set common variables for the environment. This is automatically pulled in in the root terragrunt.hcl configuration to feed forward to the child modules.
locals {
  environment    = "prod"
  region         = "eu-west-1"
  instance_count = 3
}
We can now create a terragrunt.hcl file in each module-directory in which you’ll be able to refer to the Terraform module with its inputs. In this file, you can also utilise the environment-specific variables you set earlier in the env.hcl file.
locals {
  # Automatically load environment-level variables
  environment_vars = read_terragrunt_config(find_in_parent_folders("env.hcl"))

  # Extract out common variables for reuse
  env    = local.environment_vars.locals.environment
  region = local.environment_vars.locals.region
}

# Terragrunt will copy the Terraform configurations specified by the source parameter, along with any files in the
# working directory, into a temporary folder, and execute your Terraform commands in that folder.
terraform {
  source = "../../modules/network"
}

# These are the variables we have to pass in to use the module specified in the terragrunt configuration above
inputs = {
  cidr_block      = "10.40.0.0/16"
  subnets_private = ["10.40.0.0/19", "10.40.64.0/19", "10.40.128.0/19"]
  subnets_public  = ["10.40.32.0/20", "10.40.96.0/20", "10.40.160.0/20"]
}
That should be the basics! You can create a module terragrunt.hcl file in its own directory for each module you have and repeat all those steps for a new environment. Next, we’ll see which commands we can use to manage/deploy/destroy our infrastructure using Terragrunt.
Managing environments
Terragrunt functions as a wrapper around the basic terraform command. This means what whenever we run terragrunt, it’ll run terraform in the background.
Having this in the back of our mind, let’s take a look at some of the commands we can use:
# Deploy all environments
terragrunt run-all plan -out plan.out
terragrunt run-all apply plan.out

# Deploy a single environment
cd prod
terragrunt run-all plan -out plan.out
terragrunt run-all apply plan.out

# Deploy a single module in a specific environment
cd prod/network
terragrunt run-all plan -out plan.out
terragrunt run-all apply plan.out
Thoughts
Out of the three options I’ve discussed in this post, this might be my least favorite. Although you have a great tool with lots of capabilities, I’ve frequently found it to present a rather steep learning curve for newcomers. If you have the time and the resources to really take a deep dive into Terragrunt and you have some larger projects, I believe Terragrunt is a great tool.
In scenarios where time and project scale are limited, there exist other (and maybe better) options like working with different directories and Terraform worspaces. These options may better suit projects with tighter schedules and smaller scopes, allowing for quicker and more manageable infrastructure management.
| Advantages | Disadvantages |
|---|---|
| Supports a hierarchical configuration structure, allowing you to define configurations at different levels | Introduces an additional layer of complexity compared to using only Terraform |
| Offers automation capabilities for common workflows | Additional tool you need to manage and keep up-to-date |
| Minimizes duplication of code (DRY) | Hierarchical configuration can lead to increased complexity if not managed well |
| Capable of generating backend configurations per environment |
I would choose…
Now, as we wrap up this exploration, let’s address the pivotal question: which option should you choose to manage multiple environments in Terraform?
Different directories when trying to keep it simple
Imagine you’re working on a small project - perhaps a Lambda function with some CloudWatch logging - and you need a straightforward deployment process. In this scenario, I’d go with using different directories as it keeps a clear separation between environments while also allowing you to deploy the project with a simple command.
Considering that your project is small (let’s assume fewer than 100 lines of code), the minimal code duplication involved should not pose a significant issue.
Terraform workspaces for larger projects
Now, suppose you’re tackling a larger project with constraints on time and resources, yet the need to deploy across multiple environments persists. They allow you to define separate variables for each environment, keep all the code in a single location (which helps with code deduplication), and allows you to easily switch between environments.
One limitation to be aware of is that Terraform workspaces do not support different module versions between environments. So, if you need to deploy version 1.1.0 of a module in development while keeping production on version 1.0.0, you might face a challenge. However, if this isn’t a critical concern, Terraform workspaces present an excellent option.
Terragrunt when you have time and resources to get used to it
Terragrunt is great; it offers a lot of features Terraform itself doesn’t offer and really enhances your workflow. However, adopting Terragrunt introduces a learning curve, especially for newcomers. Therefore, I recommend this option when you (and your team) have the luxury of time and resources to become proficient with it.
Terragrunt offers unique advantages, but it’s not a tool you’d want to rush into. Given the opportunity to master it, Terragrunt can be a game-changer for your infrastructure management.